Before we start installing ATG's Commerce Reference Store, there are some pre-requisites which we must take into account before the installation.
Please read this guide very carefully, and make sure you install exact versions of the software listed ahead. Please read the terms and conditions of the software before installing. Some steps might look obvious, but might have slight changes, so follow them carefully.
1. Java Installation
Download and install the Java Version 1.7.0 version 79, and install it in any of the root drive, and not in program files.
E.g. Your JDK path should look like: C:\Java\jdk1.7.0_79
Set the following environment variables. If you do not know how to set environment variables, please google it. Every windows version might have slight different process to set them.
a. JAVA_HOME: Set this to your JDK Directory. [e.g. C:\Java\jdk1.7.0_79]
b. PATH: Add/Append the JAVA_HOME/bin path. [e.g. C:\Java\jdk1.7.0_79\bin]
2. Weblogic Installation
Next you have to install Weblogic Version 12.1.2.0.0. Please read the terms and conditions before downloading/installing. Weblogic can be downloaded from edelivery.oracle.com.
a. Create a Folder "Oracle" in any of your root drives. [e.g. D:\Oracle]
b. Create an environment variable ORACLE_HOME and set the value to the above folder.
c. Open CMD and write: echo %ORACLE_HOME%
d. Press enter. It should print D:\Oracle. If not, re-check your environment variable and restart the system.
e. Extract/Copy the Weblogic JAR file into this folder (D:\Oracle).
f. Open CMD (as administrator) and change the directory to D:\Oracle. Use command cd D:\Oracle
g. Next, use the command %JAVA_HOME%/bin/java -jar
f. Wait for the installer to extract. A GUI will appear after some time.
g. Press Next -> Next, and Installer will ask for Oracle Home. Set the Oracle home to D:\Oracle\Middleware. Press Next.
h. Installation Type -> Weblogic Server (this is pre-selected). Proceed with the steps.
i. For Security Updates, select "i wish to remain uninformed...". Press Next/Continue.
j. Press Install when in appears. Wait for the installation to complete.
h. A configuration Wizard will start automatically.
i. Select "Create new domain", and set the location to "D:\Oracle\Middleware\domains\atg11". Press Next -> Next.
j. User username and password, set name as "weblogic" and password as "Welcome1".
h. Make sure domain mode is "Development" and correct JDK is shown in next step. If not, set the correct JDK. Press Next.
i. Check on "Administration Server". Press Next -> Next -> Create.
j. It will start the configuration. Let it complete and proceed with other steps.
k. Once the process completes, you can remove the Weblogic JAR file from D:\Oracle if you wish.
To test if the configuration was successful, goto D:\Oracle\Middleware\domains\atg11 and double click on "startWebLogic.cmd". A cmd window will open and will start the weblogic admin server. If the last line appears as "Server state changed to RUNNING". This means the server has started.
a. Open a browser and hit the URL: http://localhost:7001/console
b. Wait for a few seconds, for weblogic admin application to deploy.
c. A screen asking for username and password appears. Type weblogic and Welcome1 as username and password respectively.
d. Finally you should see this screen

3. Endeca Installation
For Endeca, Guided Search and Experience Manager should be installed. Guided Search include MDEX, Platform Services, Endeca Workbench, Presentation API. Download these installers from edelivery.oracle.com. Read terms and conditions carefully before download and installation.
a. Install Oracle Commerce MDEX (Version 6.5.0) on your system. Set the environment variable:
ENDECA_MDEX_ROOT to D:\Endeca\MDEX\6.5.0
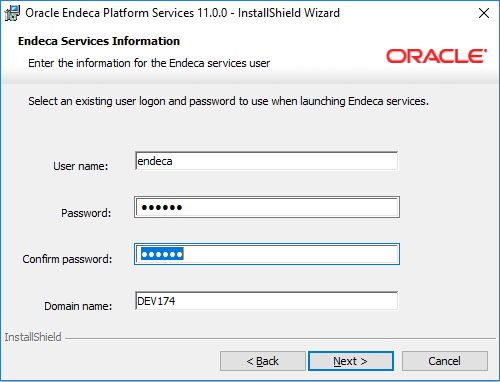
b. Start the installation of Oracle Commerce Platform Services(Version 11.0). Proceed through the steps and when asked for Username, Password, fill in your SYSTEM's username and password. If your system does not have a password, please create one.
d. Next, install Oracle Commerce Tools and Frameworks with Guided Search. Do a Minimal Installation, and change the default install path to D:\Endeca\ToolsAndFrameworks. For credentials set admin/admin.
e. Set the following environment variables:
ENDECA_TOOLS_ROOT - D:\Endeca\ToolsAndFrameworks\11.0.0
ENDECA_TOOLS_CONF - D:\Endeca\ToolsAndFrameworks\11.0.0\server\workspace
f. Next, install Oracle Commerce Content Acquisition System Version 11.0
g. Restart your system
h. Go to the Tools and Frameworks Directory\
E.g.: D:\Endeca\ToolsAndFrameworks\11.0.0\server\bin
double click on run.bat. Once the server starts, hit the URL:
http://localhost:8006
You should see the following screen. Put admin/admin as username and password.

Once logged in, you should see the following screen.

If you can see this screen, Endeca is installed successfully.
4. Database Installation
You can choose any database that you wish. In this guide, we will use MySQL (v5.7.1.6) database. Configure the root username and password as root/root. Leave the default port to 3306. Once this is done and installation completes, follow the below steps.
a. Open cmd
b. Change to the directory of MySQL Server (e.g. cd C:\Program Files\MySQL\MySQL Server 5.7\bin\)
c. Type the command: mysql.exe -h localhost -u root -p
d. Enter the password as root
e. Your database will be connected and you will see a mysql> prompt
f. Create a new user named atg. Use the command: create user 'atg' identified by 'atg'
g. To test this, try logging in as 'atg' user. Use the above command and replace 'root' by 'atg'. If login is successful, your user is successfully created.
h. Now, again login as root user.
i. Create 4 ATG schemas: ATG_CORE, ATG_CAT_A, ATG_CAT_B and ATG_PUB, and grant all privileges for these schemas to atg user created above. See below screenshot.

To check this configuration, login as the atg user, and use the command: show databases;
This should display the 4 schemas you created above. See below screenshot.

With this your basic environment configuration for ATG is done. Let us move on and install ATG.


Hi just wanted to check instead of using mysql separately ..can we just configure the demo one provided with ATG installers.
ReplyDeleteYes, that can be configured.
DeleteHi,
ReplyDeleteCan you please tell me why we need Endeca ?
Endeca is needed for the following:-
Delete1. Anything you search on the website, is a hit to endeca, which returns the result.
2. Anything you browse (open a category, search etc.), the results are returned by Endeca
3. Some dynamic content is also rendered by Endeca (Experience Manager)
This is why you need to install Endeca.
Hi,
ReplyDeleteCan you pls tell me whether these software are free of cost??
For development use on your machine, there are no charges.
DeleteYou can download from edelivery.oracle.com
For production use, there is a cost, for which you can contact oracle.
Hi,
ReplyDeleteCan we do CRS installation and setup without Endeca Installation ?
No. A lot of things won't work.
Delete